Guide de configuration Iono Pi + CODESYS

Turning a Raspberry Pi into an Industrial PLC
Introduction
An entry-level compact PLC might cost a few hundred dollars, but the software to program it can cost even more, sometimes as an annual subscription. For a student just trying to learn how a PLC works, that price tag is a real deterrent.
That was the exact roadblock I encountered during my instrumentation, automation, and robotics training. Brands like Allen-Bradley, Siemens, and ABB make fantastic equipment, built to last decades on a factory floor. But none of it was designed for a hobbyist’s workbench.
I had to find a compromise: something serious enough to let me learn real concepts—IEC 61131-3 standards, ladder logic programming, task cycles—but also affordable.
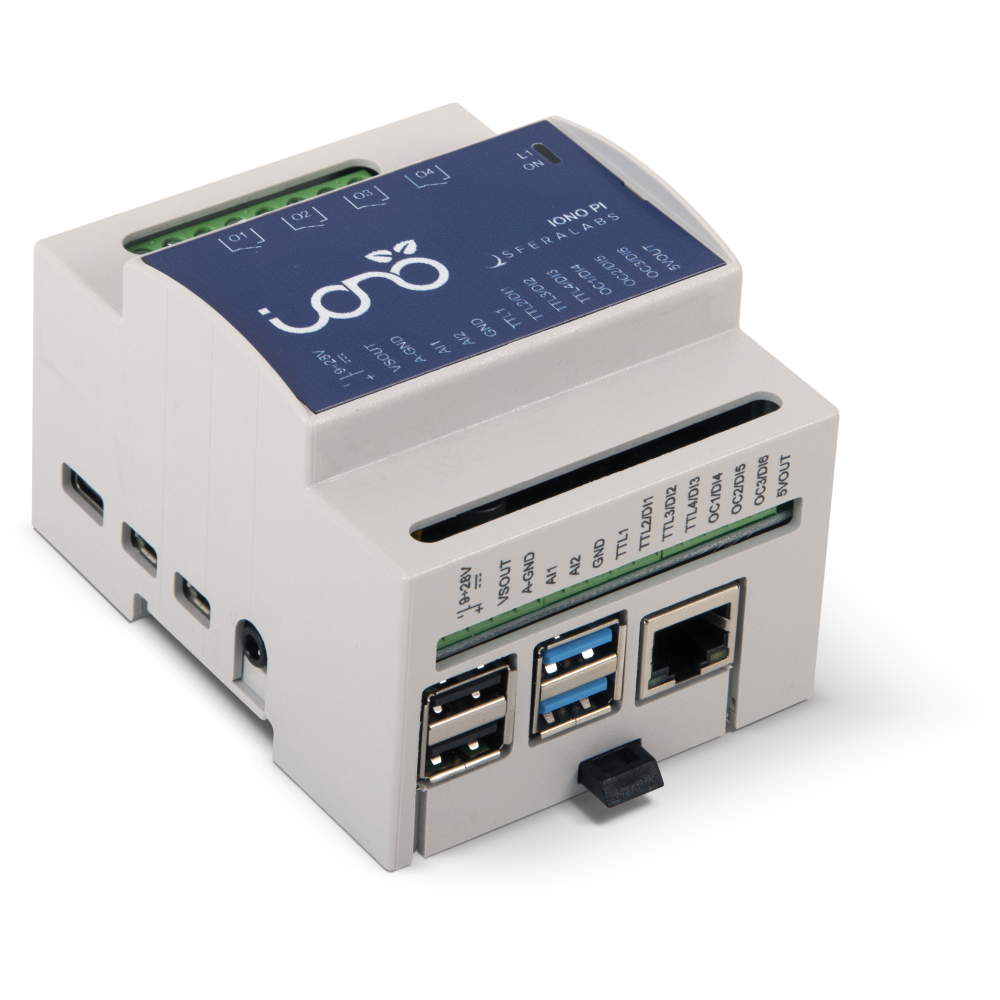
I finally discovered that you can transform a Raspberry Pi into a PLC. Specifically, I found that Sfera Labs sells a Raspberry Pi-based PLC called the Iono Pi. It’s a Raspberry Pi 4 with an Input/Output module that combines several digital and analog input lines, all housed in a DIN rail enclosure. It features 6A relays, 0-40V inputs, open collector outputs, and a real-time clock. It’s programmable via CODESYS, which is free in development mode (with a 2-hour runtime limit, but by that point, I’d be willing to pay for a license if needed).
All I had to do was make it work.
Materials
The model I use is an IPMB20T48: an Iono Pi equipped with a Raspberry Pi 4 Model B with 8GB of RAM.
Info
My unit doesn’t have the ATECC608 secure element, but I don’t require it.
https://sferalabs.cc/product/iono-pi/
I purchased a bench power supply to power it, but initially, I powered it using a simple 12V power supply.
Operating System
Like any computer, it needs an operating system. Contrary to what I initially thought, this choice is not trivial.
So, which operating system should you choose?
Raspberry Pi OS (Legacy, 64-bit) Lite
Based on my understanding, Raspberry Pi OS (Legacy, 64-bit) Lite is the correct choice.
There are three key parts to that name, and each one matters:
-
64-bit, because CODESYS requires its runtime to match the system. There are three variants: Raspberry Pi SL (32-bit single-core), Raspberry Pi MC SL (32-bit multi-core), and Raspberry Pi 64 SL (64-bit). Choosing the wrong one means starting over from scratch. This is crucial to monitor.
-
Lite, meaning without a graphical interface. The Raspberry Pi 4 already gets quite hot inside a closed DIN rail enclosure—Sfera Labs even recommends throttling its frequency. A graphical desktop runs dozens of unnecessary services and generates extra heat. As I’m comfortable with the command line, a graphical interface offers no benefit here. Therefore, the Lite version is perfect for my needs.
-
Legacy, finally. This term can be confusing: it doesn’t mean an obsolete version, but the previous stable release—Debian 12 “Bookworm”—while the standard option now points to Debian 13 “Trixie”. This choice isn’t dictated by my Iono Pi, but by CODESYS: its runtime isn’t yet validated on Trixie. Bookworm remains the tested version and the one on which this entire guide has been verified.
Installing the Operating System
I prefer to use the dedicated Raspberry Pi Imager software—it’s simple and easy to use.

https://www.raspberrypi.com/software/
Once installed, open the software.
Note that the interface may differ from what I describe here, depending on the version.
Choosing the Device
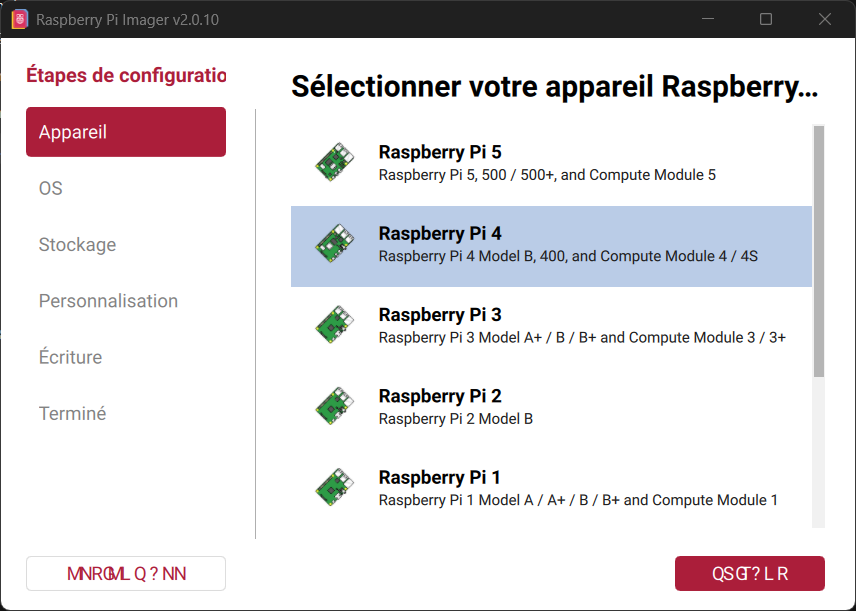
I first selected my board model:
Raspberry Pi 4
Raspberry Pi 4 Model B, 400, and Computer Module 4 / 4S).
Choosing the OS
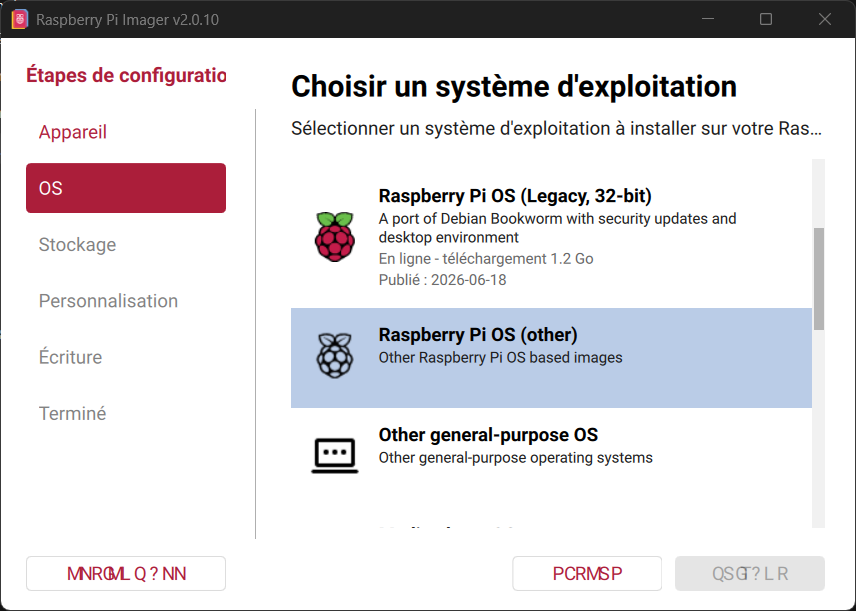
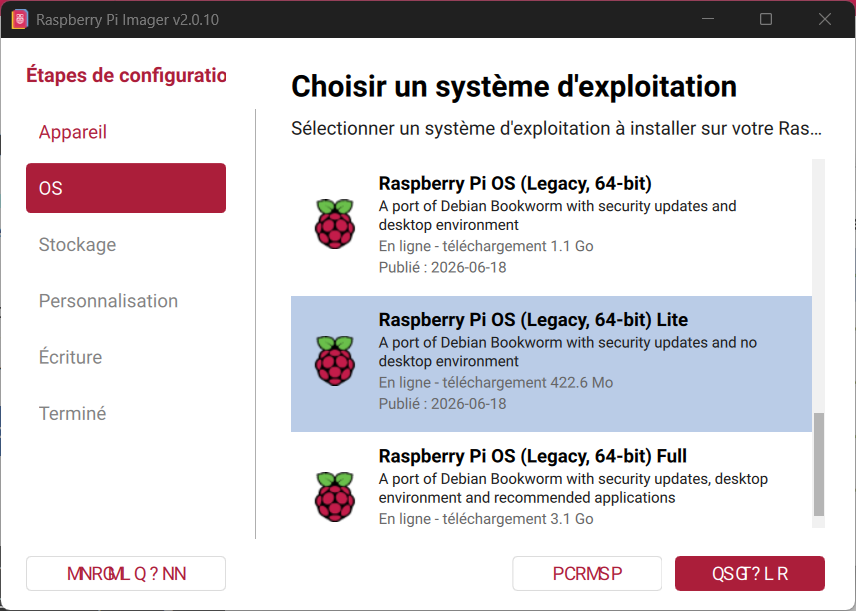

Then, in the OS section, I navigated to the Raspberry Pi OS (other) subsection and chose:
Raspberry Pi OS (Legacy, 64-bit) Lite
A port of Debian Bookworm with security updates and no desktop environment.
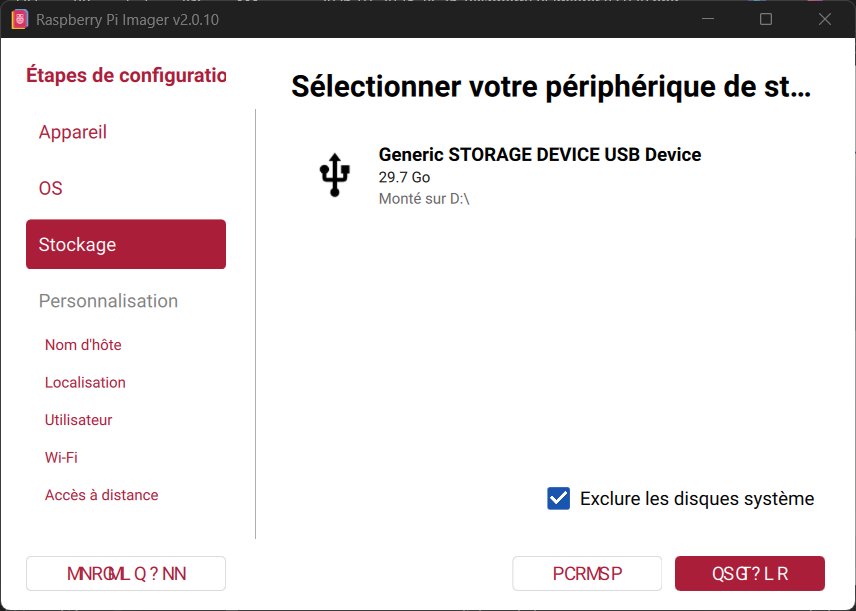
Storage Device
You’ll need an SD card reader for the software to detect your Raspberry Pi’s SD card.
Once selected, we can proceed to the Customization section.
Customization
| Setting | Value |
|---|---|
| Hostname | I chose IONOPI, but you can choose another name for your device. |
| Username & Password | To be created—Bookworm no longer has a default pi account. This is the main user of your device. You can create others, but this one will allow you to continue the configuration via SSH. |
| Timezone & Keyboard Layout | According to your region. |
| Wi-Fi or Ethernet | According to your setup. In my case, I used wireless. |
| Enable SSH | ✅ Checked, with password authentication. |
Ensure SSH is configured: we will need it for CODESYS.
Take note of the username and password you entered, as we will use them to connect to the Raspberry Pi.
Info
A note on wireless: Wi-Fi works perfectly fine for a learning setup. However, note that the Sfera Labs manual explains how to disable Wi-Fi and Bluetooth (p. 24)—a sign that this is not the preferred option in an industrial environment. For a permanent installation, Ethernet remains more reliable.
Tip
IP Address: You will need to figure this out somehow on your network. There are ways to configure a static IP address by modifying files, but this guide will not cover this.
Afterward, simply follow the software’s instructions to write the image to the SD card.
Insert and Power ON
Remove your SD card from your computer and insert it into the Iono Pi.
Note
The Micro SD card can be inserted through a small opening on the side of the case. Use a small pen or paper clip to gently push the card in its slot.
Connect the power supply to the VS+ and VS- terminals.
Power must only be supplied through the VS+ / VS- terminals with 9-28V DC.
Important
Never connect the Raspberry Pi’s USB-C port for power on an Iono Pi. The manual is clear on this point: connecting both power sources simultaneously risks damaging the hardware.
A blue LED on the front panel will light up when power is present.
After the device boots (this may take a minute or two), it should appear on your network with the hostname you set during customization (e.g., IONOPI).
You can find its IP address by checking your router’s connected devices list, or by using a network scanner tool.
Take note of the IP address and proceed to the SSH connection in the next section."
SSH Connection
Now that the Iono Pi is powered on and connected to the same network as your computer, you can connect to it via SSH to continue the configuration.
On Windows 10/11, the OpenSSH client is an optional feature. Check if it’s already installed (it often is on recent versions), and if not, you can add it through Settings > Apps > Optional Features.
Use one of the following commands to connect via SSH to your Raspberry Pi from a terminal (PowerShell, Command Prompt, or Windows Terminal).
# Basic SSH connection
ssh username@192.168.1.100

# Specify a non-default port (if you changed it)
ssh -p 2222 username@192.168.1.100

# Connect with verbose output for troubleshooting
ssh -v username@192.168.1.100
Replace:
usernamewith the username you created during the OS customization.192.168.1.100with the actual IP address assigned to your Raspberry Pi on your network.
On the first connection, you will be asked to confirm the host’s fingerprint. Type yes to continue.
Tip
If you are like me and have tested multiple OS images to find the right one for the Iono Pi, you may have formatted your SD card several times. This can prevent you from reconnecting to the Raspberry Pi if you previously configured its fingerprint on your computer. To fix this, you can remove the old fingerprint:
ssh-keygen -R hostnameWhat it does:
- Deletes all entries for the specified host from the
known_hostsfile (usually~/.ssh/known_hosts). The hostname can also be an IP address. - Use this when a server’s host key has changed and SSH refuses to connect with a “REMOTE HOST IDENTIFICATION HAS CHANGED!” error, or when you want to clear an old/incorrect host key.
Afterward, you will be prompted to enter the password for the username you specified. Use the password you configured during the Raspberry Pi OS customization.
No characters will be displayed when you type the password, this is normal for security. Each keystroke is still registered. Press Enter to submit the password. If authentication fails, simply run the SSH command again to retry.
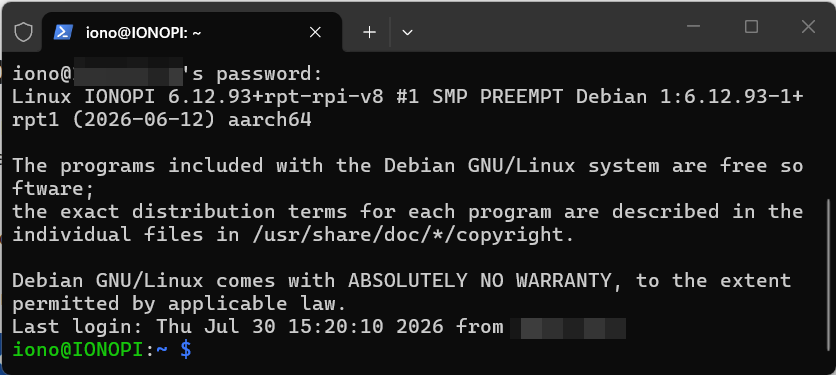
When you have a active SSH connection you should see a similar screen has mine.
System verification
Before anything else, confirm that the image written to the SD card matches what you think it is. Four commands, four distinct pieces of information.
uname -m                 # → aarch64 (64-bit; confirms the runtime choice)
uname -a                 # → Linux IONOPI 6.12.93+rpt-rpi-v8 ... aarch64
cat /etc/os-release      # → Debian GNU/Linux 12 (bookworm)
cat /etc/rpi-issue       # → image from 2026-06-18, stage2 = Lite version
Update the system and add missing tools
sudo apt update && sudo apt full-upgrade -y- Update refreshes the list of available packages.
- Full-upgrade installs the updates, including those that require adding or removing dependencies.
sudo apt install -y i2c-toolsThis package provides i2cdetect, i2cget and i2cset, which will be needed to confirm that the real-time clock appear on the I²C bus.
Enable the hardware buses
sudo raspi-configNavigate to Interface Options, then enable:
| Bus | |
|---|---|
| SPI | The MCP3204 analogue-to-digital converter communicates over SPI0. Without this, the analogue inputs are simply unreachable. |
| I²C | The MCP79410 real-time clock sits at address 0x6f. On “R” model units, the ATECC608 secure element sits at 0x60. |
These options write dtparam=spi=on and dtparam=i2c_arm=on into the configuration file, you can also add them by hand, which amounts to the same thing.